Tuesday, November 12, 2013

Artfull Crafts Garage Days


Hi Everyone!  I can't believe October has come and gone already.  Where in the world has time gone?! Here in the States, we are just about to Thanksgiving and winter is starting to blow in.  Perfect weather for cozying up in my scrap room with yummy Kaiser papers.  I have a couple projects to show you from Artfull Crafts today.

This time, I'm here showing you some inspiration from the Garage Days range.  This is perfect for my three boys.  It is full of blues, oranges, and garage accents.  I used the 6x6 papers to put together this mini album.  I inked all the pages of the album first with Gathered Twigs distress ink.  Then I just loaded it up with paper, embellishments, brads, twine, chipboard, and rub ons all from the Garage Days collection.


I was able to take my leftovers and make a layout as well.  Did I mention that I love this range????


My son was a Walmart Employee for Halloween.  He totally cracked me up!  He does these terrible, fake accents and that night he was a Russian.  :)


Make sure you pop on over to the Artfull Crafts Shop to pick up Garage Days and all that yummy Heidi Swapp that has been floating around the blog.

See you soon!
Lydia

Tuesday, November 5, 2013

Heidi Swapp Center Stage

is such a fun range to play with.  So many possibilities!  Lydia here with a quick post to show off some of this yummy goodness.


The colours of this paper range makes it work for any subject or photo.  As I was putting this layout together, my 12 year old son looked over my shoulder.  He was excited when he saw the layout was about him and said he "didn't mind the pink".  :)  Proving this line can be used for anyone.


I used some of Heidi's Color Shine as the base of my layout and papers from the 6x6 pad.  I especially liked the page with all the circles and cut out several for this layout.


Make sure you pop on over to the Artfull Crafts shop to pick up Heidi Swapp Centre Stage.  I'm sure it won't stay in the store for long!  I'll be back next week with more projects showing off this range.

See you soon!
Lydia

Monday, November 4, 2013

Frosted Designs November Scrapbooking Kit


Hi Everyone!  Today I  am here with the Frosted Designs November Scrapbooking Kit and a tutorial for you.  I am really thrilled that Barb asked me to play with this kit.  It is put together with such beautiful papers and embellishments.  All the things I look for when buying a kit.  This is definitely one that I would buy.

I wanted to show you a couple different things with this kit.  I really like the tags that are included.  They are great to just use as they are or to mist/ink them up.


Many of my mists are still packed from our move, but I managed to find these.  Any mists would do.  The Dylusions Inks would give it a nice darker color.


I started by using one color and then right after I added two other colors.  Applying them while it is still damp allows the colors to blend together just a bit.


For this tag, I decided to put it on a piece of Pink Paislee paper that comes in the kit.  I had in mind to cut the "tag" from the paper and use it.  I didn't notice until I was done with the misting that one "arm" of the E was tucked under and so it didn't look like an E on the paper.  Whoops!  Lesson learned to make sure you check the tag first before misting.  :)


Here are both tags misted up with about three different colors.  I really like the way these tags hold the color and really make the letters pop.

I thought I would show you how I usually put together a layout.  I'm sure there are many of you out there that have developed your own way as I have myself.  But I am always interested in seeing how someone else thinks.  :)


I start by gathering everything I think I'm going to use on my layout.  Papers, photos, embellishments that are all from the November Scrapbooking Kit.  This kit is PACKED with fun things.


Next, I begin laying it out.  I originally thought I would use the yellow paper as my background and decided to use the white paper instead.  I wanted my photo to pop a little more and thought the white was a better choice.


Then I decided that my page needed a bit of mist on it.  So gold mist it was to mimic the gold Aspen leaves.


Next, I just begin laying things out where I think they will go.  Nothing is taped down at this point because then I can move things around as needed.  When I become sure things are in place where I want them to be, I will tape them down with double sided tape.


I cut off the top of my misted tag so I could include it on two spots on my layout.  I have cut a couple tags and words from one of the 12x12 papers.  I just love papers that have extras like that where you can use them as a whole or cut apart.


I put the tag "best day" on on of the dark colored tags so the words would show up better.  In the end, I wanted to change it to a different piece of paper but it was already on.  So I made it work and ended up liking the way it looked.


Did I mention how much I love all the embellishments with this kit?  I love the flair and the resin flowers along with all the tags and goodies that came with the embellishments.  The dollies are awesome too!  All sizes!!


Here is my finished layout.  As I said, I'm sure you all have your own way of putting layouts together but I hope this gives you an inside look at how my creative thinking works.  For anyone just starting out or finding your own way, my advice to you would be just go with what feels right.  Push things around until they look the way you like.  I usually start out with more things on my table than what actually end up on my layout.  There are also times that I will look at a layout when its done or almost done and think something is missing and add just one more thing.  :)


Make sure you stop on by the Frosted Designs store to purchase this kit and other great products.  From now until November 10, anyone who purchases a November Scrapbooking Kit and mentions my name "Lydia" will receive a special gift just from me!  I will send you a package of any wood veneer of your choice ($3.99 or less).  Just make sure you tell Barb that I sent you!

Thanks for stopping by today!
Lydia


Saturday, November 2, 2013

Frosted Designs November Scrapbooking Kit


 Hi Everyone!  I just love the November Scrapbooking Kit from Frosted Designs.  I would love to share a layout with you using this kit.  I am not normally drawn to gold but I found the gold in this kit to be the right subtle finishing touches.  


This kit is packed with loads of fun embellishments from Maggie Holms.  I love the resin flowers and the embellishments along with all the fabulous patterned paper.  And don't forget the dollies!  I love them!


 This sewn banner......well, it comes that way!  A true win for me!  :)


I have always told each one of my three boys that they are my favorite.  I have done this for years and they now know to try to use it in their favor.  "But Mum.....I AM your favorite...."

The November Scrapbooking Kit is really a versatile and fun kit to play with.  Make sure you stop on over at the Frosted Designs Store to buy this kit and many other great products.  Keep checking back at the Frosted Designs Blog for more inspiration with this kit.

See you again soon!
Lydia
Tuesday, October 29, 2013

Artfull Crafts

Today has been a cold, wet, very wintery feeling day in Colorado.  A lovely day to stay in and have a play with some yummy Kaiser ranges.  First up is a card from the "Lady Rose" collection.  I'm not a card maker but the 12x12 paper that has tags on it is perfect for cards or layouts.  A bit of lace ribbon and flowers complete it.  


The "Base Coat" range is full of rustic looking barn wood and brick patterns.  Paired with buttons, tags, twine, and a few chipboard accents, it made for a great boy layout.  


Pop on over to the Artfull Crafts shop for these ranges and so much more.  See you soon with some more new yummy ranges and products!

Lydia

Friday, October 25, 2013

Tag You're It!

I'm back with another layout with Persimmon from the Frosted Designs shop.  I truly love this collection and will be using it for many projects and order more.  :)  

Lori is hosting the challenge over at the Frosted Designs blog with a challenge for you.  The challenge is "Tag You're It".....use a tag or ticket on your project.  Any way you want, just make sure it has a tag or ticket on it.  

For my layout, the tag I used is from Pink Paislee Color Wash Watercolor tags set.  I misted my tag with Glimmer mist and inked it with Distress ink.  I have also used the 12x12 Persimmon paper from Basic Grey along with some 6x6 paper behind my tag.  A single wood veneer heart from Studio Calico finishes the page.  


We have just moved to Colorado 8 weeks ago and I am loving autumn here.  My favorite weekend trip is to Rocky Mountain National Park to see the elk in rut and the aspen turning golden.  Snow on the mountains is just an added bonus.  It truly is a gorgeous time of year.


Make sure you stop by the Frosted Designs blog to check out the other designer's tag projects and to play along.  Don't forget to link up your project for the chance to win a prize and so I can check them out.  Tag!  You're it!  :)


Tuesday, October 22, 2013

Persimmon

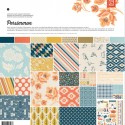
Hello Friends!  I'm here with Frosted Designs today to show you the yummy Persimmon paper collection from Basic Grey.  When I first saw this collection, I knew I was going to love it and boy do I!  I believe it is one that I will use till there is nothing left and then reorder.  The blues, oranges, browns, yellows, and creams are perfect for fall, boys, or any occasion.

I used papers from both the 12x12 and the 6x6 pads along with the chipboard embellishments.


I just love the alphabet sticker sheet that comes with the 12x12 paper collection.  It includes three different styles and sizes.  The chipboard pack has a ton of fun embellishments in it, including these leaves, the bird, and flowers.  I just love all the different things it has to offer.


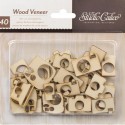
I've included one wee Um Wow heart on my page.  I absolutely LOVE the wood veneer cameras by Studio Calico.  They are so fun!  I have added a small scrap of patterned paper behind the camera just to show it off a bit more.  


I have many other projects in mind with this collection and cannot wait to get started with them.  Make sure you stop on over at the Frosted Designs shop to find these products and much more.  There are new ones arriving often and even some sale/clearance products.

Thanks for stopping by!