Tuesday, March 5, 2013

Toilet Paper Hearts Tutorial...

Hi Everyone!  Lydia here and today I would like to show you how to make 3D hearts out of toilet paper.  I first made these with my sister-in-law and have made them for several projects now.  They are fun and easy to make.

Supplies you will need are:

*Parchment Paper (Baker's paper)
*Toilet Paper (any kind.....here I have some really cheap thin stuff!)
*Mod Podge (or similar glue)
*Foam Paint Brushes
*Acrylic Paint


Begin by tearing off several squares of toilet paper.  The number you will need depends on how big you want your heart to be or how many you want to make.  Toilet paper will stick to gluey fingers if trying to tear off more after you've begun glueing.  :)


Dip the foam brush in the Mod Podge and apply a generous amount to the toilet paper square.  I squish it around to get all the glue into the paper.  Lay the paper on the parchment paper and start to form the heart.  


 Continue this step until the heart is complete and shaped the way you would like it to be.


Again, the size of the hearts will depend on how many sheets of toilet paper you have used.   


The hearts will need to dry on the parchment paper over night.  I have found that best rather than try to dry them with a heat tool.  In the morning, I turn the hearts over so the bottoms can dry.  They are usually ready to paint within 24 hours of making them.  If there are rough edges of dried glue, just trim them with scissors.


Use a foam brush to apply acrylic paint to the hearts.  Since the hearts are 3D and the surface not smooth, I find it best to dab the paint onto them.


When the paint has dried, the hearts are ready to be used on your project or add a second color of paint/mist/ink to them.


Here are some recent projects I have made using toilet paper hearts.  I use Mod Podge to adhere them to my projects.  You could also use a hot glue gun.


I hope you have enjoyed my tutorial on toilet paper hearts.  Make sure you stop by the Frosted Designs blog to play along with all the challenges and meet the new Design Team.  I would love to see your toilet paper hearts.  Link your project up here on my blog or my post on the FD blog so I can check them out.  Thanks for stopping by!

~Make your day a beautiful one~

Saturday, March 2, 2013

Chevrons

Chevrons are such a hot trend!  I notice them everywhere.  Even walking in the snow the other day, I noticed someone's boot print was a chevron pattern.  "Chevrons" is the challenge over at Frosted Designs for the next two weeks.

I decided to make a chevron canvas for this challenge.  I started by making a triangle template to trace for my chevrons.  I cut a 12x12 square.....because I "forgot" I have a ton  few sheets of 12x12 paper.  Whoops!  :)  I cut the 12x12 in half corner to corner.  Then cut that triangle in half straight up the middle.  I used double sided tape to hold them together so I could trace them onto my canvas.


I just eyeballed the distance between them but you could measure the space between each row.


Next, I chose my color pallet and started painting.  It took at least two coats of paint for most colors and even a third on a few.  When the paint was dry I used a black sharpie and a ruler to define the lines of each chevron.


I mixed white paint and water and used a paper towel to "white wash" the whole canvas.  I loved the bright random colors but wanted to tone it down just a bit.  


I painted a camera and did some hearts for the finishing touches.  I really wanted some sort of quote on this canvas.  I looked around the internet and really didn't find one I wanted to use.  So I kind of made up my own.  I do believe that my (our) heart captures so much more than my actual camera does.  


I hope you will join us at Frosted Designs for the "Chevron" challenge.  Make sure you link up your project for the chance to win a great prize and so I can check them out.

~Make your day a beautiful one~

Friday, February 15, 2013

Be Bold

There are so many exciting things are happening over at Frosted Designs!!  New team, monthly challenges, tutorials.....make sure you stop by the blog to check it all out.  The challenge this time around is "Be Bold".  This is not a combination that I work often with so it was a great challenge for me.  :)  

I had recently stripped floral wallpaper from the boy's bathroom.  For some reason my three, "all boy" boys didn't really care for pink floral wallpaper.  ;)  I painted the walls a soft grey and each boy is assigned a different color for their towel.  (My secret way of knowing who hasn't hung theirs up!)  The room needed some art to bring out those colors.  

I made a canvas reminding them of three bathroom "jobs".  Wash.  Flush.  Brush.  I used the tree colors from their towels for the canvas.  


Bright blue, Celery Green, and Pumpkin Orange were my color choices for this project.  


I used a large canvas and divided it into three equal sections.  I sectioned it off with a light pencil line and used a yard stick to put vinyl letters on it.


Next is painting the color on.  It took several coats to get the colors to be rich enough and cover the white canvas.


After the colors were dry, I used a craft knife to gently peel the letters off.  I touched them up with a few coats of white paint.  It takes a steady hand to get them filled in just right.  After the white was dry, I touched the letters up again with the appropriate color.


Eventually, the canvas will have a black frame around it.  And the bathroom will have towel bars.  :D


Hope you will join us at Frosted Designs for this "Be Bold" challenge.  Make sure you link up your project for the chance to win a great prize and so I can check them out!  

~Make your day a beautiful one~

Thursday, January 31, 2013

Love hearts...

Frosted Designs is changing up the challenges just a bit.  There will be two challenges a month and plenty of tutorials and techniques to share with you in between.  Make sure you check out the blog for all the details!

February is known as the love month appropriately with Valentine's day approaching.  The first challenge of the month is "to use the word LOVE and at least one HEART on your project".  

I found this canvas on a clearance for $2.17.  I really liked that it was on a stand and double sided.  Although my son liked it for the soccer scene, I saw potential!  :)


So I took this canvas, left the stand black, and covered it with some remnant fabric.  The fabric cost me $1.56.  I used Mod Podge to adhere it to the canvas.  I did the same with the lace and doily, both from my sister-in-law.


I made this heart using the same technique as the small red one for my She Art canvas.  It too is adhered with Mod Podge.  The letters are stuck on with a strong glue stick just so they won't fall off when its standing upright.


A strand of pearls from my SIL's stash completes this side of the canvas.  I'm thinking eventually the other side will read "Do what you love".  But for now "Love what you do" seemed appropriate, especially with me starting a new photography job that I absolutely love.

The cost of this project was less than $4 and a bit of creativity.  I have a second canvas like this that has a football on it.  Don't think that football will stay around long.  :)

Head on over to the Frosted Designs blog to check out the new changes and to link up your project.  Can't wait to check them out!

~Make your day a beautiful one~

Friday, January 25, 2013

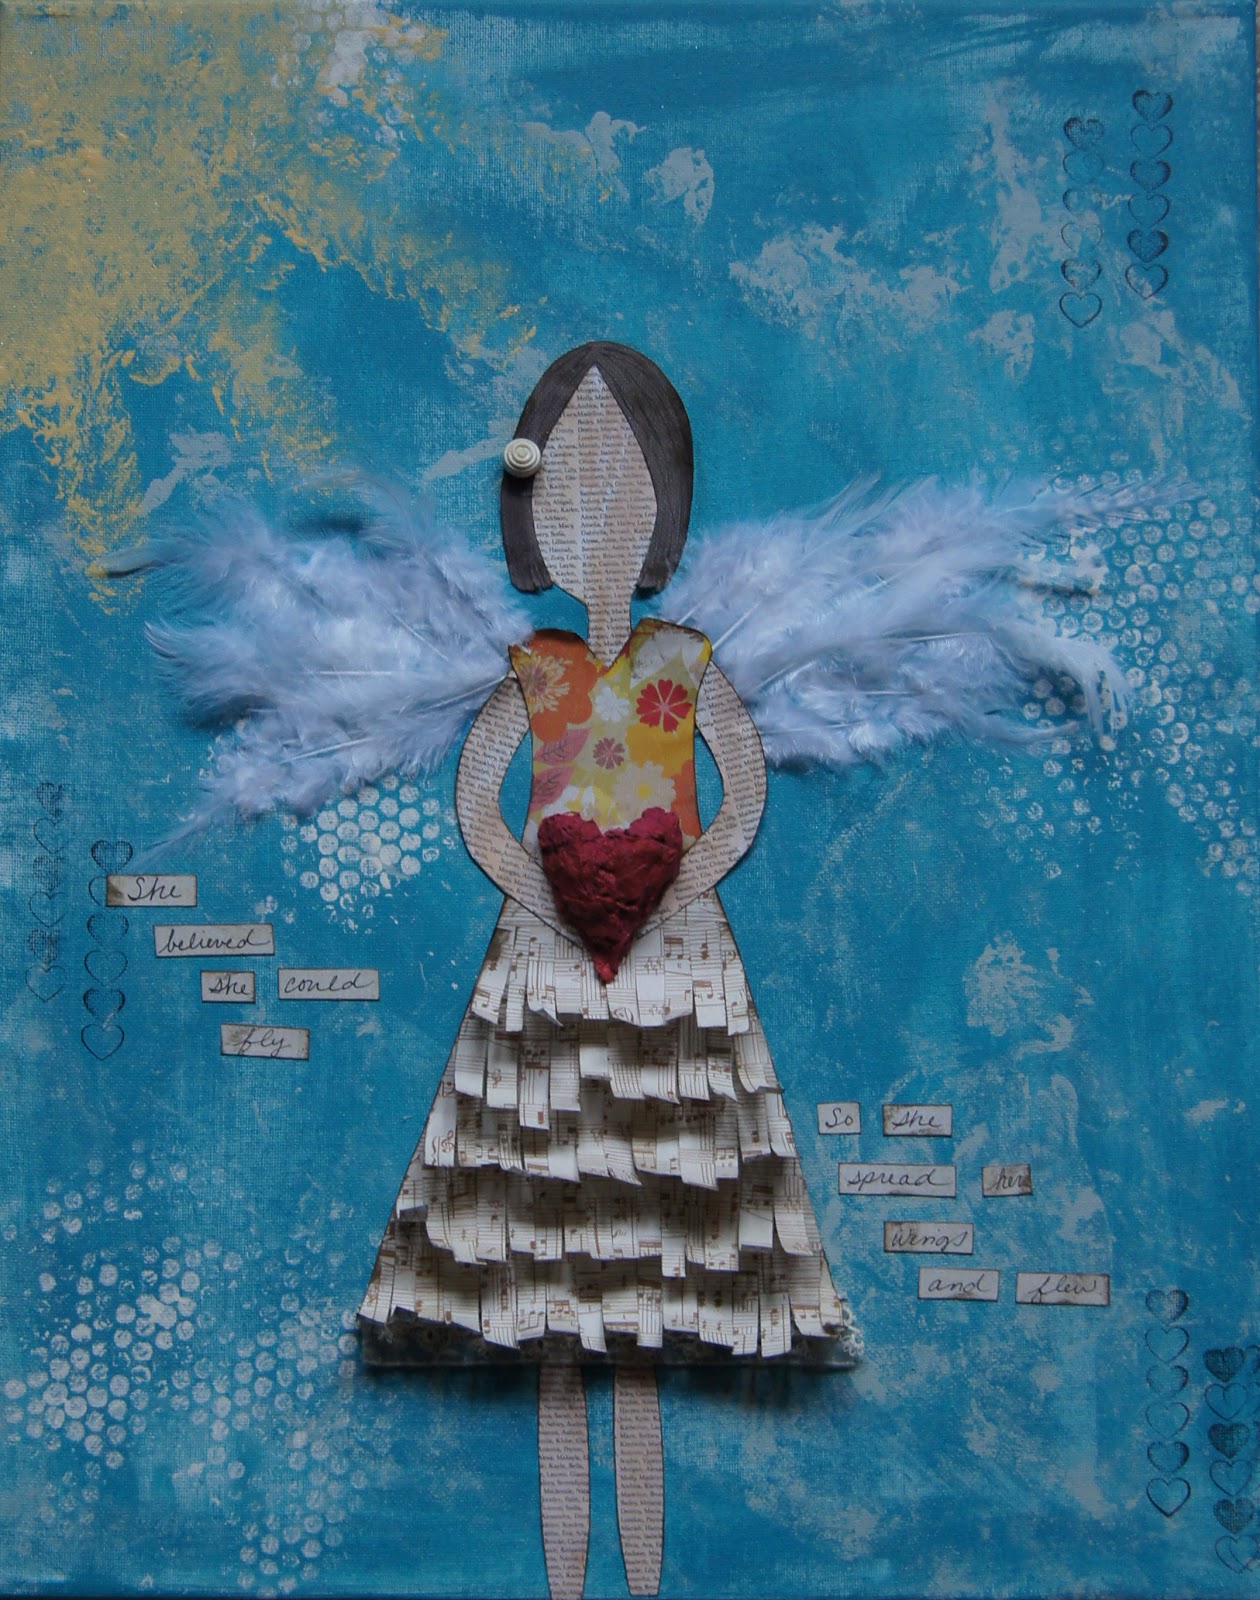
She believed she could fly.....

.........So she spread her wings and flew.

"Music" is the challenge this week at Frosted Designs.  If you haven't been on the FD blog, make sure you stop over there to see the Design Team's creations.  They are beautiful!  


 I wanted to make a She Art canvas for my project.  I have had this canvas in my mind for quite some time so it was nice to get her done.  The base paint is wall paint of my best friend's.  I helped her paint her room and her two daughter's rooms in their new house.  As I was washing out my brush, it occurred to me to use them as the base for my canvas and the sun.  I love the way it turned out.  


I used a sheet of Crate Paper (LOVE Crate Paper products) for her skirt.  It seemed a bit flat to me so I cut strips of the same paper and curled them slightly with a pencil.  


I wanted her heart to be 3D, so I made one.  I love the way my heart turned out!  I will be showing you this in an upcoming tutorial.  


Feathers, some bubble wrap painting, a bit of stamping, lace, and a button finish out my canvas.  This was such a fun project to do.  I have ideas for my next one and cannot wait to get her started.  

I hope you will join us over at Frosted Designs for this week's challenge.  Make sure you link up your project so I can check them out and for the chance to win a great prize.  Everyone loves a prize!  :)  

~Make your day a beautiful one~
  

Thursday, January 24, 2013

Love you

Its been a long time since I played in my scrap room for fun.  Or for a challenge.  With moving to Illinois from New Zealand, living with family for a short time, moving into our house, waiting on our container with all our earthly "things" to arrive, and working on a few home improvement projects.....well that hasn't left much time for playing.

With a challenge issued from my DT leader and a DT member, I have taken the time to play in my scrap room.  Guess what?  It was enjoyable!!  :)


I have done this layout for Quick Quotes banner challenge.  I used paint chips and a heart punch to make my banner.  This is my middle son Ian.  At the time he had a girlfriend and wanted to take her roses to the Intermediate School Disco.  I was so proud of him being brave enough to take her flowers. He told me after the disco he was "the only one who brought a girl flowers!"  So cute.

Thanks for stopping by.  Tomorrow I will have a post up for Frosted Designs, another project that I enjoyed making.
~Make today a beautiful day!~

Saturday, January 12, 2013

Bucket List...Frosted Designs

Hi Everyone.....Its been a whirlwind, CRAZY month plus since I posted last.  I'm so thankful to be with the Frosted Designs family.  :)  This group of ladies IS like a family.

This week's Fabulous Friday challenge is "Bucket List".  I am sure we all have some sort of bucket list whether on paper or in our mind.  I see a bucket list as dreams so I took the challenge in that direction for my layout.


My list includes:
*being "known" for my scrappy creations"
*being an amazing photographer
*Owning my own business (of some sort)
*Being a better mum to my boys


I hope you will play along with us with the "Bucket List" challenge this week.  Make sure you link up your project to the Frosted Designs blog so I can check them out and for a chance to win a great prize!

Happy Crafting!!  :)